I don't remember exactly why I bought a Ronco Food Dehydrator but I do know I was in University, it was super late and we had just returned from the bar. There is the real possibility that I might have been craving banana chips or dried apple slices.
I haven't used my dehydrator much over the years as it has been at my parents place where they use it every Fall to dehydrate the leftover herbs from their garden. As we began to plan our backcountry canoe trip this summer I knew it was time to get it back and tackle dehydrating full meals. It is easier than you might imagine to dehydrate meals, it just takes a bit of planning and time. Lots of time.
There are several basic steps that will apply to anything you want to dehydrate. Once you learn these you can easily adapt them to dehydrate all your favourite meals. One of my favourite meals from this summers backcountry camping trip can be found below.
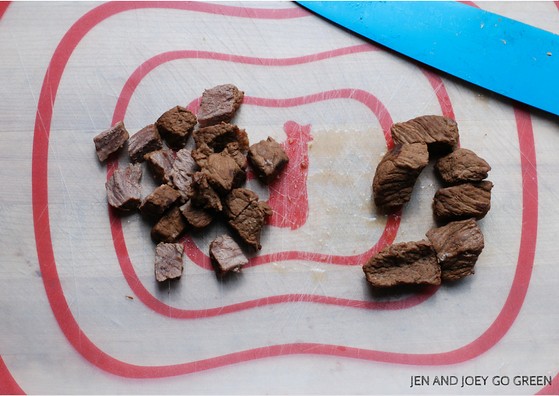
To dehydrate evenly ensure food is all the same size
Not all parts of the meal have to be the same size but you need to keep food separated by size on each tray to ensure it has the proper amount of time in the dehydrator. For rehydration, keeping the food separated by size will ensure that anything that is larger and needs to be pre-soaked will get the amount of moisture and time it needs.
Lean meats are best because fat can turn rancid
Turkey and chicken are going to be the safest choices to dehydrate without further steps but beef can easily be dehydrated as long as you rinse the meat after cooking to remove an excess fat prior to dehydration.
It's going to suck but you will have to use re-sealable plastic bags
A littler bit of me died when I realized that the only option for dehydrated food and backcountry camping was re-sealable plastic bags. Glass is a big no-no in the backcountry and plastic containers wouldn't ensure that air was removed from around the food. Save all the bags once they are empty, wash them and put them away with your camping gear for use on your next trip.
Measure liquids prior to dehydration
Knowing how much liquid you started with ensure that you add the proper amount of water back into the recipe when you are rehydrating and cooking.
Start liquids in the oven on a baking sheet
I struggled with how I was going to dehydrate the liquid in the beef stew. If you have tray bottoms for your dehydrator you can potentially skip the oven trick but if you don't then pour your thickened liquid on the baking sheet and place in the oven on the lowest setting possible with the door left open a crack. When it is the consistency of fruit leather you can transfer it to the dehydrator to finish.
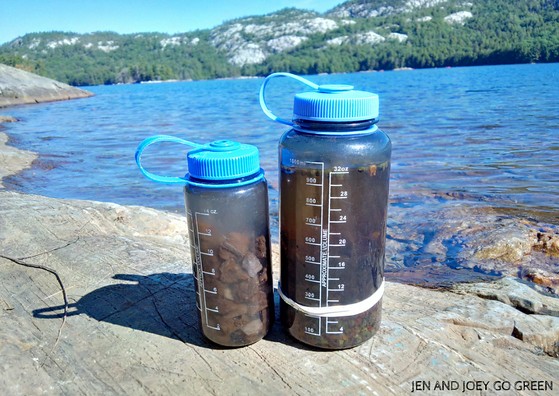
Have wide mouthed containers on hand for rehydration
Rehydrating your food in water over the course of the day will reduce the amount of cooking time (and gas) it will require to make your meal. Meats will need the most time, followed by large vegetables, smaller vegetables and liquid. Using wide mouthed containers will prevent leaks and ensure that you can pour the contents out when it is time to cook.
Plan your meals around days travel days
The last thing you need is to be portaging food as it is rehydrating so plan your meals around the days you are staying at your site. Those that require longer rehydration times are best for the days that you are staying at your site. Those that don't require any pre-rehydration or very little time are best for travel days.
Dehydrated Beef Stew Recipe
You can also use the dehydration tips throughout this recipe and apply it to your favourite beef stew recipe.
What You Will Need
Dehydrator
Re-sealable plastic bags
Parchment paper
Stewing beef
1.5 boxes of organic beef broth
1 cup water
4 carrots, chopped
1 small onion, chopped
2 garlic cloves, crushed
3 celery chopped
1 cup corn
1 cup peas
1/2 tsp dried thyme
Salt
Pepper
Cooking Directions
Brown stewing beef in a large pot, add garlic and stir for a few minutes. Add carrots onion and celery and continue to stir. Season with salt, pepper and thyme. Add broth and water and bring to a boil. Once boiling, reduce to a low simmer and add corn and peas. Continue to simmer for 1 hour and then remove from heat and allow to cool slightly.
Separate beef, vegetables and liquid. Add a mixture of cornstarch and water to the liquid to thicken slightly. You want it to be more like gravy to aid in the dehydration process.

Dehydration Directions
NOTE - times may vary based on your dehydrator so follow the manufacturer instructions but the times I have used seem to be about what I have found in other similar recipes.
- Cut beef and carrots in half to reduce dehydration and rehydration times (you do this part at this stage vs when you originally cut it so they won't be over cooked when you are making the stew).
- Place vegetables and thickened liquid in separate containers in the fridge.
- Place the beef on the trays in the dehydrator and allow to work its magic for ~ 24 hours. You will know it is done when you can't see/feel any moisture left when you cut into a piece.
- Allow to cool completely and place into a re-sealable bag. Ensure all the air is out of the bag by placing a straw inside and sucking the air out.
- Remove vegetables from the fridge and place in the dehydrator. If you do not have bottom tray covers for your trays you will need to make some from parchment paper as the food will shrink and slip through the slots.
- Allow vegetables to dehydrate for 12 hours or until you can't see/feel moisture.
- Place vegetables into a re-sealable bag and ensure the air is out of it.
- Remove liquid from the fridge and place on a parchment lined baking sheet in the oven on the lowest setting. Allow to bake until it is the consistency of fruit leather.
- Remove from baking sheet and add to the dehydrator and allow to continue to dehydrator until all moisture is removed.
- Place dehydrated liquid into a re-sealable bag and ensure the air is out.
- Place all 3 re-sealable bags into a larger bag with any specific rehydration instructions (ie: amount of water required).
Rehydration Directions
- Place meat into a wide mouthed container and add enough water to cover the beef. Reseal container and allow to rehydrate for 8 hours.
- Place vegetables and liquid in a separate wide mouthed container and add enough water to cover. Close and allow to rehydrate for at least 1 hour.
- Pour beef (including the water), liquid and vegetables into a pot and bring to a boil. Allow to simmer until fully reconstituted.
- Add additional spices as needed.
- Serve over rehydrated mashed potatoes (make these by preparing mashed potatoes as you normally would, spreading onto parchment lined trays in the dehydrator, rehydrating in water for at least 2 hours, reheat in a pot on the stove remove from heat and allow to sit closed for 10+ minutes).
Have you dehydrated food for camping? What was your favourite recipe?
Related Posts - Check them Out!
Juicing Without a Juicer
Camping at Halfway Lake Provincial Park
Campfire Nachos
This post contains Affiliate links that help me pay for my bug ridden canoe trips.


Wow - it has never occurred to me to dehydrate meat - such an interesting idea. I bet you have the BEST camping food ever!
ReplyDeleteI take camping food very seriously ;) But it has to be quick and easy as I don't want to be spending all my time cooking.
DeleteI wanted to let you know that I am a huge fan of your blog and you are listed on my site as one of the best 100 Eco-Friendly Blogs. I would be honored if you could share the post with your readers and fans. http://healthymomsmagazine.net/2016/09/100-top-eco-friendly-blogs.html
ReplyDeleteAmazing! It looks easy to make, nice post!
ReplyDeleteHow long does this last? Have you done this to save for emergencies too?
ReplyDeleteHi Elizabeth, I made the stew a month before we went camping and stored it in the back of the pantry so it was not exposed to light. It could last longer than a month you just need to make sure it is being stored properly either in an airtight container, a vacuum bag or you could even freeze it. I have never dehydrated for emergencies, just for camping.
DeleteHi, Jen. Thanks for sharing your recipe! I'm wondering if you've ever sent something like this in a resupply package. My worry is that because of the meat, the meal will spoil if it sits in a 5 gallon plastic bucket in a post office for 3-5 weeks. Any thoughts you're able share on this concern would be greatly appreciated!
Delete